Azure Key Vault – The file type of the certificate to be imported must be .pfx or .pem

I was trying to import some existing certificates into Key Vault, using the Azure portal. All certificates were in PFX format and had a private key, but for some reason trying to import some of them was failing with the following error:

The file type of the certificate to be imported must be .pfx or .pem


https://user-images.githubusercontent.com/761098/55885240-e1f45e80-5ba9-11e9-92fd-cf45419efc64.png

After spending a couple of hours a colleague of mine suggested to change the file extension to lowercase, and guess what? It worked! The error message was not being displayed anymore:

https://user-images.githubusercontent.com/761098/55885507-5cbd7980-5baa-11e9-955e-ae584634f412.png

This is not the kind of bug I’d expect from the Microsoft guys, but hey they’re only human. Luckily I was able to find an easy workaround, otherwise I’d have to use Powershell or .NET code to import the certificate.

That’s it, happy coding! πŸ™‚

Deploying an Azure WebJob via VSTS without deleting existing WebJobs

The scenario:
I have an Azure App Service that is hosting 5 different WebJobs. I have configured a release on Visual Studio Team Services (VSTS) to deploy each WebJob to Azure, independently from each other.

The problem:
Deploying a WebJob deletes the other WebJobs that were already deployed!!!

Solution:
Tick the “Set DoNotDelete flag” – current files/folders in the App Service in will be preserved while publishing website.

deploy-webjob.png

Powershell scripts running on Bamboo don’t return the correct exit code

As part of an deployment project on Bamboo CI, I was running a powershell script to deploy an ASP.NET application to a Cloud Service on Azure.

Even though there was an error executing the script, Bamboo was setting the status of the Deployment to Success. Why? Because the exit code returned by the powershell script is always 0 (zero means successful execution).

After some research I was able to find a way to return the correct exit code in case of failure. I added the following lines to the top of my powershell script:

trap
{
    write-output $_
    exit 1
}

The trap statement includes a list of statements to run when a terminating error occurs – in this case, every time an error occurs the error message will be displayed and then the script will return a correct exit code indicating a failure. I am returning 1 but any value different from 0 (zero) will do the trick πŸ™‚

Managing deployments to Azure

Β The scenario – I am working on an ASP.NET web site that is hosted on Azure as a Cloud Service.

I have automated both the build and the deployment to the cloud using the Bamboo build server. The build compiles the solution, runs the unit tests and generates the deployment packages that are used by Bamboo to deploy the site to Azure.

I could use Bamboo to manage all deployments but given that Cloud Services offer out-of-the-box support for blue-green deployments I decided to take advantage of both systems. This is how I have organised things:

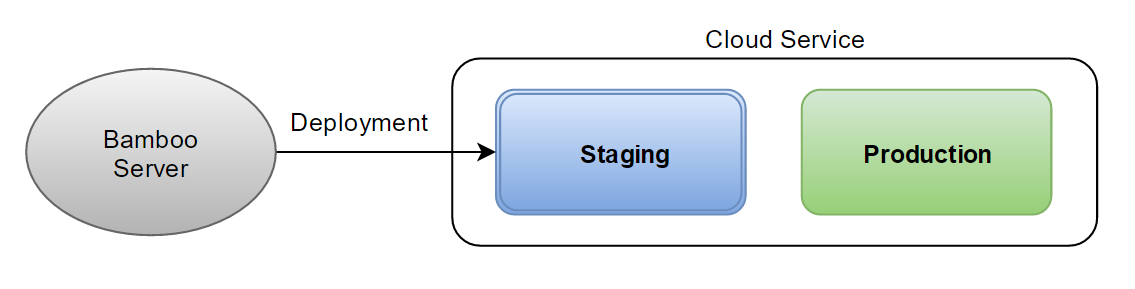
1. Deployment to Staging

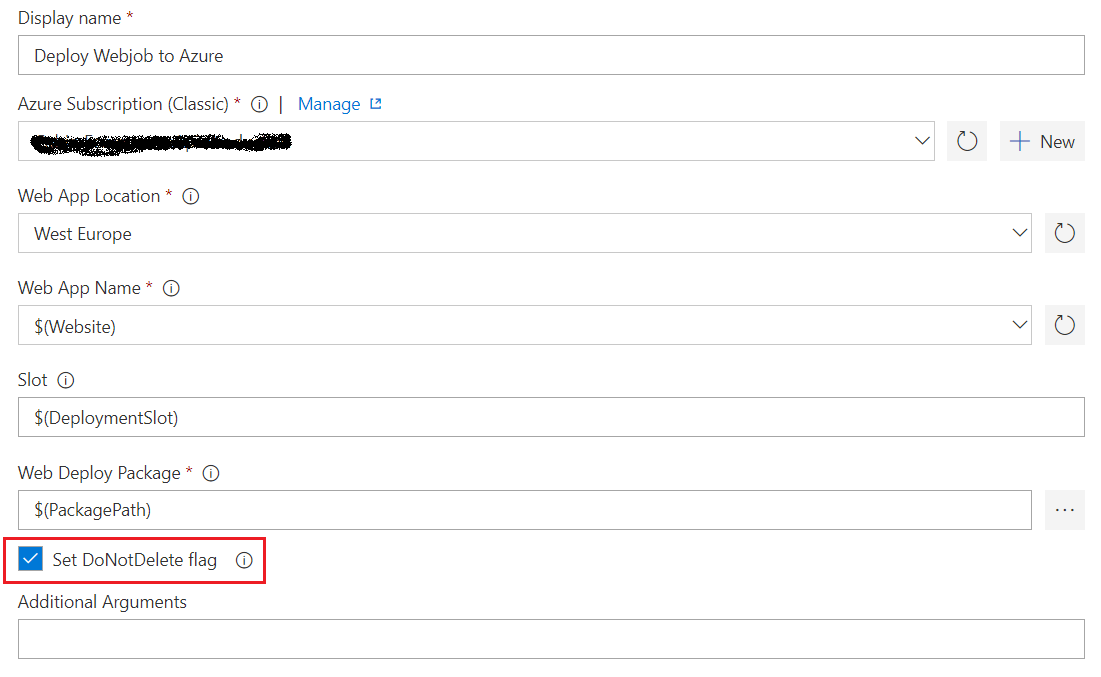
Deployment to Staging is performed by Bamboo. Automated tests are executed as part of the deployment to check if everything is working as expected. Additional manual tests should be executed as well before deploying to Production.

bamboo-to-cloud-service

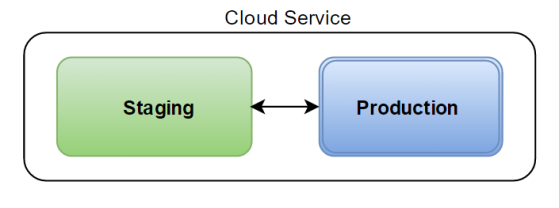
2. Deployment to Production

This is done using the Azure Management Portal – simply click on the Swap button and traffic will be routed to the Staging environment, which now becomes the Production environment.
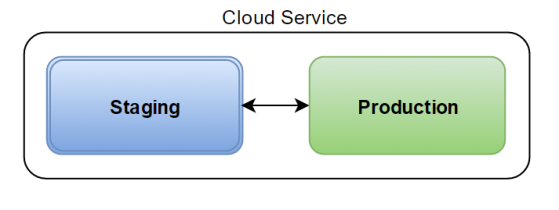
swap-to-production

3. Rolling Back

Something went wrong? No problem, click on the Swap button again to switch the environments – it’s just as simple as that.

rollback-deployment

Final thoughts

Azure Web Sites or Cloud Services offer out-of-the-box support for blue-green deployments, which provide a simple and powerful way to test a deployment before going to production and roll it back, if necessary.

You can use your Continuous Delivery server in conjunction with Azure Management Portal to manage your deployments to the cloud – consider all the advantages and disadvantages and use the functionalities of each system that makes your life easier πŸ™‚