Unit testing your IoC container

I decided to write this post after reading a question on StackOverflow, where the OP was asking for recommendations to simplify his IoC setup code – to make it more readable and also to prevent runtime errors when resolving instances, whenever a change is made.

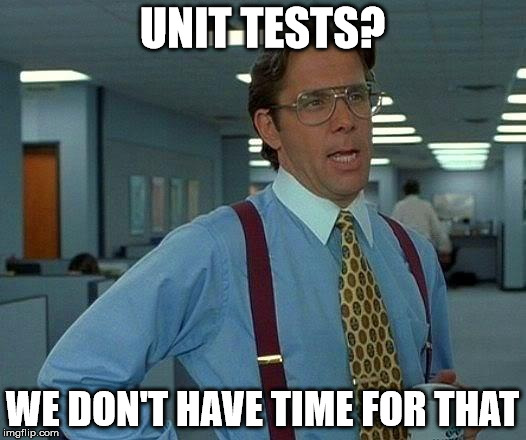
I feel his pain. Anyone that used and configured an IoC container such as Unity knows how easy it is to break things when you add or change an existing configuration. So, how to detect if things are broken until it’s too late (runtime errors)? Writing tests, obviously.

In this post I’ll show you a quick and simple way to test your dependencies using Unity IoC container.


The scenario – a shopping cart service

Let’s assume a simple scenario – a service that allows users to check the all the items and corresponding prices of his shopping cart. The service uses a logger, a repository to read the information of the cart and a currency service that is used to display the prices in the currency selected by the user:

Source code is the following (methods omitted for brevity):

public interface ILogger
{
}

public class AsyncLogger : ILogger
{
}

public class ConsoleLogger : ILogger
{
}

public class FileLogger : ILogger
{
}

public interface ICurrencyApiClient
{
}

public class CurrencyApiClient : ICurrencyApiClient
{
    private readonly string _apiKey;
    private readonly ILogger _logger;

    public CurrencyApiClient(string apiKey, ILogger logger)
    {
        _apiKey = apiKey ?? throw new ArgumentNullException(nameof(apiKey));
        _logger = logger ?? throw new ArgumentNullException(nameof(logger));
    }
}

public interface IRepository
{
}

public class Repository : IRepository
{
    private readonly string _connectionString;

    public Repository(string connectionString)
    {
        _connectionString = connectionString ?? throw new ArgumentNullException(nameof(connectionString));
    }
}

public class ShoppingCartService : IShoppingCartService
{
    private readonly IRepository _repository;
    private readonly ICurrencyApiClient _currencyApiClient;
    private readonly ILogger _logger;

    public ShoppingCartService(IRepository repository, ICurrencyApiClient currencyApiClient, ILogger logger)
    {
        _repository = repository ?? throw new ArgumentNullException(nameof(repository));
        _currencyApiClient = currencyApiClient ?? throw new ArgumentNullException(nameof(currencyApiClient));
        _logger = logger ?? throw new ArgumentNullException(nameof(logger));
    }
}

Configuring the dependencies

The first thing to do is to put the IoC code in a class library that can be easily referenced by a test project. You can then add your Bootstrapper class, something like this:

    public class Bootstrapper
    {
        public IUnityContainer Init()
        {
            var container = new UnityContainer();

            // dependencies registration goes here....

            return container;
        }
    }

Please note that the Init() method returns the IoC container – you’ll need it in the unit tests when trying to resolve the instances.

Full source code of the Bootstrapper is the following:

    public class Bootstrapper
    {
        private readonly NameValueCollection _appSettings;
        private readonly ConnectionStringSettingsCollection _connectionStrings;

        public Bootstrapper(
            NameValueCollection appSettings = null,
            ConnectionStringSettingsCollection connectionStrings = null
        )
        {
            _appSettings = appSettings ?? ConfigurationManager.AppSettings;
            _connectionStrings = connectionStrings ?? ConfigurationManager.ConnectionStrings;
        }

        public IUnityContainer Init()
        {
            var container = new UnityContainer();

            // default logger is AsyncLogger
            container.RegisterType();

            // named instances for loggers
            container.RegisterType(nameof(AsyncLogger));
            container.RegisterType(nameof(ConsoleLogger));
            container.RegisterType(nameof(FileLogger));

            container.RegisterType(new InjectionFactory(CreateCurrencyApiClient));
            container.RegisterType(new InjectionFactory(CreateRepository));

            container.RegisterType();

            return container;
        }
    }

Some notes:

  • The constructor takes 2 optional parameters (appSettings and connectionStrings), which can be used for testing purposes. If no values are provided it will use the values from the configuration file.
  • AsyncLogger, ConsoleLogger and FileLogger are registered as named instances
  • ICurrencyApiClient and IRepository are registered using a factory method

Configuring the unit tests

Now it’s time to write the unit tests. Instead of manually adding tests for every single dependency, we can use the Registrations property of IUnityContainer to get the metadata of all registered dependencies:

Writing the tests (using NUnit and Fluent Assertions):

 
    [TestFixture]
    public class BootstrapperTests
    {
        private static IUnityContainer Container => new Bootstrapper().Init();

        private static IEnumerable UnityRegistrations
        {
            get
            {
                var registrations = Container.Registrations
                                             .Where(x => x.RegisteredType != typeof(IUnityContainer))
                                             .Select(x => new TestCaseData(x.RegisteredType, x.Name));

                return registrations;
            }
        }

        [Test]
        [TestCaseSource(nameof(UnityRegistrations))]
        public void GivenATypeAndName_WhenResolvingInstance_InstanceShouldNotBeNull(Type registeredType, string instanceName)
        {
            // arrange/act
            object instance = Container.Resolve(registeredType, instanceName);

            // assert
            using (new AssertionScope())
            {
                instance.Should().BeAssignableTo(registeredType);
                instance.Should().NotBeNull();
            }
        }
    }

It’s just as simple as that. Given the registered type and the instance name of the dependencies, I can try to resolve them. If the instance is null or an exception is thrown the test will fail, which means that there is something wrong with our Bootstrapper. Also, I check if the returned instance has the expected type.

Running the code using Reshaper:

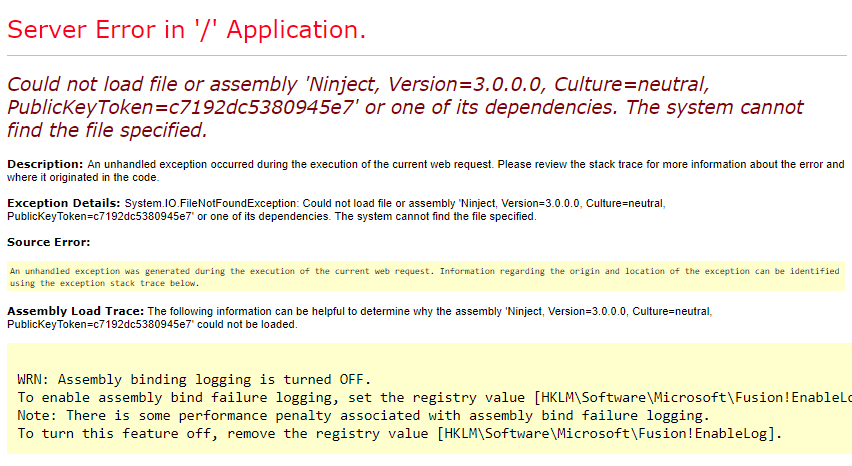
Some tests failed because I forgot to add a configuration file with the settings used by both the CurrencyApiClient and Repository. Test for IShoppingCartService fails as well because it uses both dependencies.

Fixing the code and running the tests:

All good now. As you can see, there is a test for every single type/instance name.

Final thoughts

You should add as many unit tests as possible to your code – IoC setup is no exception. Also, these tests do not exclude the usage of other type of tests such as integration or smoke tests.

My article is a good starting point, but this might not be enough. For example, if you have ASP.NET MVC or ASP.NET Web API applications, you should test your DependencyResolver in order to ensure that all controllers are being instantiated correctly (i.e. without throwing exceptions).

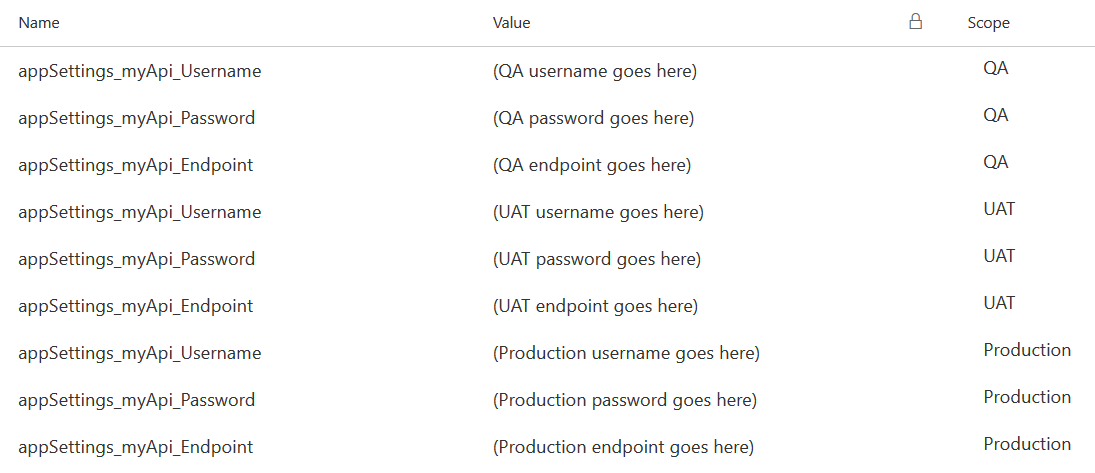
Consider also running these tests for every single environment – each environment has its own configuration, so better be safe than sorry 😉

Happy coding!

Fluent Assertions first look

I always loved Fluent Interfaces – when done properly they can make an API or library easier to use and understand. I’ve heard of Fluent Assertions before, but I confess I never gave it much attention. I usually use NUnit as my unit testing framework and I just though their API was good enough, and to be honest I didn’t want to waste much time learning yet another library. Just out of curiosity, I decided to take a look into their website today to take a look and try to understand what was the motivation behind Fluent Assertions (emphasis is mine):

Nothing is more annoying than a unit test that fails without clearly explaining why. More than often, you need to set a breakpoint and start up the debugger to be able to figure out what went wrong. (…) That’s why we designed Fluent Assertions to help you in this area. Not only by using clearly named assertion methods, but also by making sure the failure message provides as much information as possible.

I completely agree, sometimes you’re just wasting too much time trying to figure out what went wrong. I have to admit that some of the assertion messages provided by NUnit are not great, so I decided to run some tests and compare the messages between these two libraries.

Continue reading

Understanding LINQ method execution order

This is my answer to an interesting question asked yesterday on StackOverflow – what is the execution order of a LINQ query such as:

    var numbers = new[] { -1, 4, 9 };

    var sumOfRoots = numbers.Where(x => x > 0)
                            .Select(x => Math.Sqrt(x))
                            .Select(x => Math.Exp(x))
                            .Sum();

A quick an easy solution is to refactor the code in order to use custom delegates for each chained method (Where, Select and Sum), which makes things easier to debug. In this case I’m just printing a simple message to the console:

    static void Main(string[] args)
    {
        var numbers = new[] { -1, 4, 9 };

        double sum = numbers.Where(IsGreaterThanZero)
                            .Select(ToSquareRoot)       
                            .Select(ToExp)              
                            .Sum(x => ToNumber(x));

        Console.WriteLine($"{Environment.NewLine}Total = {sum}");

        Console.Read();
    }

    private static double ToNumber(double number)
    {
        Console.WriteLine($"ToNumber({number})");

        return number;
    }

    private static double ToSquareRoot(int number)
    {
        double value =  Math.Sqrt(number);

        Console.WriteLine($"Math.Sqrt({number}): {value}");

        return value;
    }

    private static double ToExp(double number)
    {
        double value =  Math.Exp(number);

        Console.WriteLine($"Math.Exp({number}): {value}");

        return value;
    }

    private static bool IsGreaterThanZero(int number)
    {
        bool isGreater = number > 0;

        Console.WriteLine($"{Environment.NewLine}{number} > 0: {isGreater}");

        return isGreater;
    }

The output is the following:
linq-order-output

Configuration settings and tests in a Continuous Delivery world

Today I’ll write about an anti-pattern that I see quite often, regarding the usage of configuration settings. Settings stored in configuration files such as web.config or app.config are a dependency that should be abstracted in order to make your code more flexible and testable!

In this article I’ll show you:

  • Some of the problems of using the configuration settings
  • How to refactor your code in order to make it more testable
  • How to refactor your tests in order to make them CI/CD friendly

The problem – testing code that uses configuration settings

Let’s suppose you are creating a service class that uses a 3rd party REST API. API’s username, password and endpoint are stored in the configuration file as follows:

<appSettings>
    <add key="myApi.Username" value="myusername" />
    <add key="myApi.Password" value="mypassword" />
    <add key="myApi.Endpoint" value="https://www.myapi.com/v1" />
</appSettings>

Consider the following code:

public class FooService
{
	private readonly string _myApiUsername;
	private readonly string _myApiPassword;
	private readonly string _myApiEndpoint;

	public FooService()
	{
		_myApiUsername = GetConfigValue("myApi.Username");
		_myApiPassword = GetConfigValue("myApi.Password");
		_myApiEndpoint = GetConfigValue("myApi.Endpoint");
	}

	private string GetConfigValue(string key)
	{
		string value = ConfigurationManager.AppSettings[key];

		if (string.IsNullOrWhiteSpace(value))
		{
			string message = $"Could not find AppSettings[\"{key}\"]!";
			throw new InvalidOperationException(message);
		}

		return value;
	}

	// code omitted for brevity
}

The first problem comes when you try to write some unit tests for this class. Using this approach will force you to have a configuration file in your unit test project, which is not a big deal.

What if you needed to use different values to test other scenarios, such as testing if an InvalidOperationException is thrown when the username, password or endpoint are null or whitespace? You’d have to find a way to override the AppSettings section of the configuration file (ugly stuff, trust me). I’ll show you next how to refactor the code to make it more testable.

Making the code unit-test friendly

Please note that this is not the best solution but just the first step to make your code more testable. This is ideal for people that, for some reason, cannot spend much time refactoring the code.

The trick is to change the constructor to take an optional NameValueCollection parameter. If this parameter is not set then it will try to get the values from the configuration file (using the ConfigurationManager.AppSettings object):

public class FooService
{
    private readonly NameValueCollection _appSettings;

    private readonly string _myApiUsername;
    private readonly string _myApiPassword;
    private readonly string _myApiEndpoint;

    public FooService(NameValueCollection appSettings = null)
    {
        _appSettings = appSettings ?? ConfigurationManager.AppSettings;

        _myApiUsername = GetConfigValue("myApi.Username");
        _myApiPassword = GetConfigValue("myApi.Password");
        _myApiEndpoint = GetConfigValue("myApi.Endpoint");
    }

    private string GetConfigValue(string key)
    {
        string value = _appSettings[key];

        if (string.IsNullOrWhiteSpace(value))
        {
            string message = $"Could not find AppSettings[\"{key}\"]!";
            throw new InvalidOperationException(message);
        }

        return value;
    }

    // service methods go here
}

Setting the values in a unit test is easy:

// arrange 
var settings = new NameValueCollection {
    {"myApi.Username", "myusername"},
    {"myApi.Password", "mypassword"},
    {"myApi.Endpoint", "myendpoint"}
};

var service = new FooService(settings);

// act
// ....

// assert
// ....

Another example – testing if an exception is thrown when the username is empty:

// arrange 
var settings = new NameValueCollection {
    {"myApi.Username", ""},
    {"myApi.Password", "mypassword"},
    {"myApi.Endpoint", "myendpoint"}
};

FooService service = null;

// act/ assert
Assert.Throws<InvalidOperationException>(() => {
    service = new FooService(settings);
});

Code is now testable, cool! I am now able to use different settings and run tests on my machine (“it works on my machine”, hurray!). But this is not good enough!

Making the code testable and CI/CD friendly

The previous refactoring is a very quick way to make code testable, but it can be improved in terms of testability and readability. The first thing I don’t like is the usage of a NameValueCollection object that contains the settings, I’d rather define an interface and a class like these ones:

public interface IApiSettings
{
    string MyApiEndpoint { get; }
    string MyApiPassword { get; }
    string MyApiUsername { get; }
}

public class ApiSettings : IApiSettings
{
    public string MyApiUsername { get; }
    public string MyApiPassword { get; }
    public string MyApiEndpoint { get; }


    public ApiSettings(string myApiUsername, string myApiPassword, string myApiEndpoint)
    {
        if (string.IsNullOrWhiteSpace(myApiUsername))
        {
            throw new ArgumentException("Username cannot be null or whitespace.", nameof(myApiUsername));
        }

        if (string.IsNullOrWhiteSpace(myApiPassword))
        {
            throw new ArgumentException("Password cannot be null or whitespace.", nameof(myApiPassword));
        }

        if (string.IsNullOrWhiteSpace(myApiEndpoint))
        {
            throw new ArgumentException("Endpoint cannot be null or whitespace.", nameof(myApiEndpoint));
        }

        MyApiUsername = myApiUsername;
        MyApiPassword = myApiPassword;
        MyApiEndpoint = myApiEndpoint;
    }
}

Refactoring FooService, one more time:

public class FooService
{
    private readonly IApiSettings _settings;

    public FooService(IApiSettings settings)
    {
        _settings = settings ?? throw new ArgumentNullException(nameof(settings));
    }

    // service methods go here
}

Now let’s talk again about the tests – things are a bit different when we’re running tests in a build or deployment pipeline, comparing to our local machine.

Different environments will have different configuration settings (connection strings, API endpoints, etc) so it’s extremely important to know what is the current environment and load the corresponding settings.

Also, where do we store these settings? We have at least these options:

  • Create one configuration file per environment
  • Configure environment variables per environment

It’s probably easier to use configuration files locally, what about the build/deployment pipeline? Using the configuration files might be an option for some environments but not for others such as Production (for security reasons). These settings can be set (manually or dynamically) using environment variables in the build/deployment pipeline.

I have used the following approach that works for both scenarios:

  • if the environment variable exists then use it
  • otherwise, use the value from the configuration file

Just to be completely clear, the environment variable takes precedence over the setting from the configuration file. I have created an helper class that will be used to get the right values to be used in the tests, according to the approach above:

public static class ConfigurationHelper
{
    public static string GetEnvironmentOrConfigValue(string key, string defaultValue = null)
    {
        if (string.IsNullOrWhiteSpace(key))
        {
            throw new ArgumentException("Value cannot be null or whitespace.", nameof(key));
        }

        string value = GetEnvironmentValue(key);

        if (!string.IsNullOrWhiteSpace(value))
        {
            return value;
        }

        value = GetConfigValue(key);

        if (!string.IsNullOrWhiteSpace(value))
        {
            return value;
        }

        return defaultValue;
    }

    private static string GetConfigValue(string key)
    {
        string value = ConfigurationManager.AppSettings[key];

        return value;
    }

    private static string GetEnvironmentValue(string key)
    {
        string variableName = string.Concat("appSettings_", key.Replace(".", "_"));
        string value = Environment.GetEnvironmentVariable(variableName);

        return value;
    }

Refactoring the tests:

// arrange
var username = ConfigurationHelper.GetEnvironmentOrConfigValue("myApi.Username");
var password = ConfigurationHelper.GetEnvironmentOrConfigValue("myApi.Password");
var endpoint = ConfigurationHelper.GetEnvironmentOrConfigValue("myApi.Endpoint");

var settings = new ApiSettings(username, password, endpoint);
var service = new FooService(settings);

// act
// ....

// assert
// ....

A quick note – you can have the same names for both the appSettings and the environment variables or follow a naming convention. In my example above, configuration setting “myApi.Username” would correspond to the environment variable “appSettings_myApi_Username“. You can use any convention you want.

So, for the following configuration settings

<appSettings>
    <add key="myApi.Username" value="myusername" />
    <add key="myApi.Password" value="mypassword" />
    <add key="myApi.Endpoint" value="https://www.myapi.com/v1" />
</appSettings>

I’d need to configure the corresponding environment variables in the build server, for each environment. Something like this:

vsts_env_variables

(Please note that this screenshot was taken from a demo release definition I created in Visual Studio Team Services (VSTS) that contains 3 environments: QA, UAT, Production).

That’s it! When the tests are run in the build server they will use the environment variables values defined above. Another good thing of this approach is that you can use both values from the configuration file and the environment variables in the build server.

Happy coding!

On smoke tests

So you have configured a new build for your ASP.NET application: the source code compiles without errors, there are no unit tests failing, the deployment package is generated and published as an artifact – great! Now it’s time to deploy it. Everything seems to be fine (no errors logged), but when you try to run your application you get an YSOD like this one:

ysod1
There are many things that can go wrong with a deployment, so it is important to configure your deployment pipeline to verify that the deployment itself was successful. You can do it by using smoke tests.

Continue reading

We don’t have time for unit tests

This is probably one of the biggest bullsh*ts people usually tell in the world of software development:

unit-tests1

I’ve heard it many times before, and I bet you’ve heard it too. I was unfortunate enough to work for companies where PMs and other people had this mentality, even giving the impression that unit tests were a waste of time. “Just do it quick and dirty” – this was a very common sentence in one of the last companies I worked for.

A lot has been written about unit tests in the last 15 or 20 years, and the advantages should be obvious by now – you can refactor your code with confidence without the fear of breaking existing functionality, you can run unit tests as part of an automated build, and so on.

But there are disadvantages as well – you do need to spend some time to write the test and debug the piece of functionality you’re testing, as obvious. This is usually the excuse given for NOT writing unit tests. But the truth is that we need to test the functionality somehow – it’s not acceptable to write a piece of code without testing it, right? You simply have to test your code, one way or another – even if you don’t use unit tests.

That leaves me with another question – from a development perspective, do you think that the alternatives ways to test your code are faster than writing a unit test? I don’t think so. I still believe that unit testing is the fastest way to do it, if you have a decent enough experience with it (you don’t need to be an expert, though). Let’s analyse the following scenario below.

The scenario – discount calculator

Imagine that you are working on an e-commerce website – the UI is an ASP.NET website that uses a REST API (ASP.NET Web API), where all the business logic is. You need to implement a discount calculator in the API, based on the customer type:

  • Platinum (20% discount)
  • Gold (10% discount)
  • Silver (5% discount)
  • Standard (no discount)

Source code would be something like this:

public interface IDiscountCalculator
{
    decimal Calculate(decimal productPrice, CustomerType customerType);
}

public enum CustomerType
{
    Standard = 0,
    Silver = 1,
    Gold = 2,
    Platinum = 3
}

So let’s examine some of the different ways we could test the discount functionality.

1. Testing using the UI (website)

In this scenario you basically need to run the website and the API, and navigate to the page where the discount is being displayed (e.g. view shopping cart). This means that you might eventually need to login, search for a product, add it to the shopping cart and then view the shopping cart in order to check if the discount is correct or not. Also, you need to do it for each customer type.

As you can imagine, this is not the most efficient way to test this functionality. We need to compile and run both the website and the REST API (authenticate user, etc).

2. Testing the API using a REST client

This is more efficient compared to the previous example (testing the UI) because you can skip all the steps mentioned before and invoke the service using a REST client such as Postman or SoapUI. You still need to create sample HTTP requests that might include HTTP headers (content type, authorization, etc), HTTP method and message body (JSON request object).

Depending on the service, it might take a while to configure the requests for each customer type. Also, we need to compile and run the REST API. Remember that in this scenario all we want to do is to calculate the discount for each customer type.

3. Testing using a console application

This is one of the simplest ways to run the test. There’s no need to use the UI to get to the page where the discount is displayed and there’s no need to create HTTP requests in order to invoke the API, i.e. we can test directly the discount functionality using .NET code. Also, console applications are faster to compile and run compared to an ASP.NET website.

4. Testing using an unit test framework

It’s basically as simple and fast as creating a console application – just add add your unit tests to a class library and you’ll be able to run the tests in a few seconds, using Visual Studio built-in functionality or a tool such as Resharper.

Conclusion

Saying “we don’t have time for unit tests” is deceiving. Giving that we need to to test our code somehow, ask yourself if the alternative to unit tests is easier and/or faster (creating a sample console app to run some tests, etc) – I’m pretty sure that in most of the cases the unit testing is the better option.

Deploying an Azure WebJob via VSTS without deleting existing WebJobs

The scenario:
I have an Azure App Service that is hosting 5 different WebJobs. I have configured a release on Visual Studio Team Services (VSTS) to deploy each WebJob to Azure, independently from each other.

The problem:
Deploying a WebJob deletes the other WebJobs that were already deployed!!!

Solution:
Tick the “Set DoNotDelete flag” – current files/folders in the App Service in will be preserved while publishing website.

deploy-webjob.png

Re-throwing exceptions without losing the original stack strace in .NET

This is nothing new – if you need to re-throw an exception in a catch block without losing the stack trace you use the throw statement like this:
01 throw
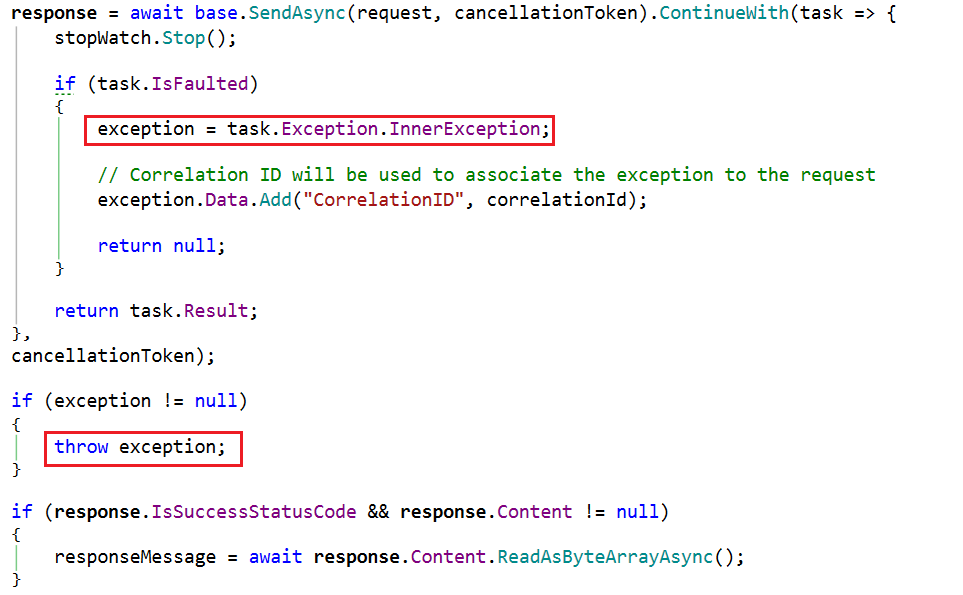
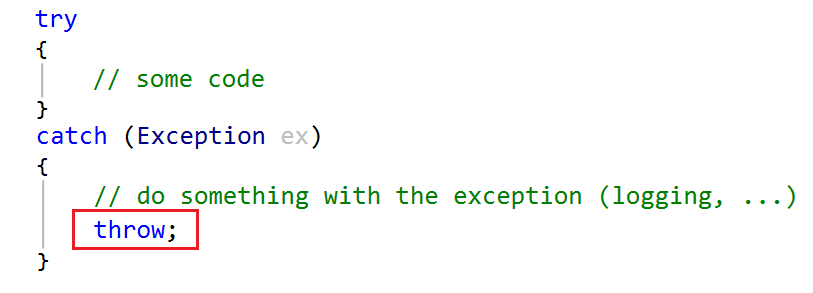
Things are a bit different outside a catch block, though. Consider the following code sample:
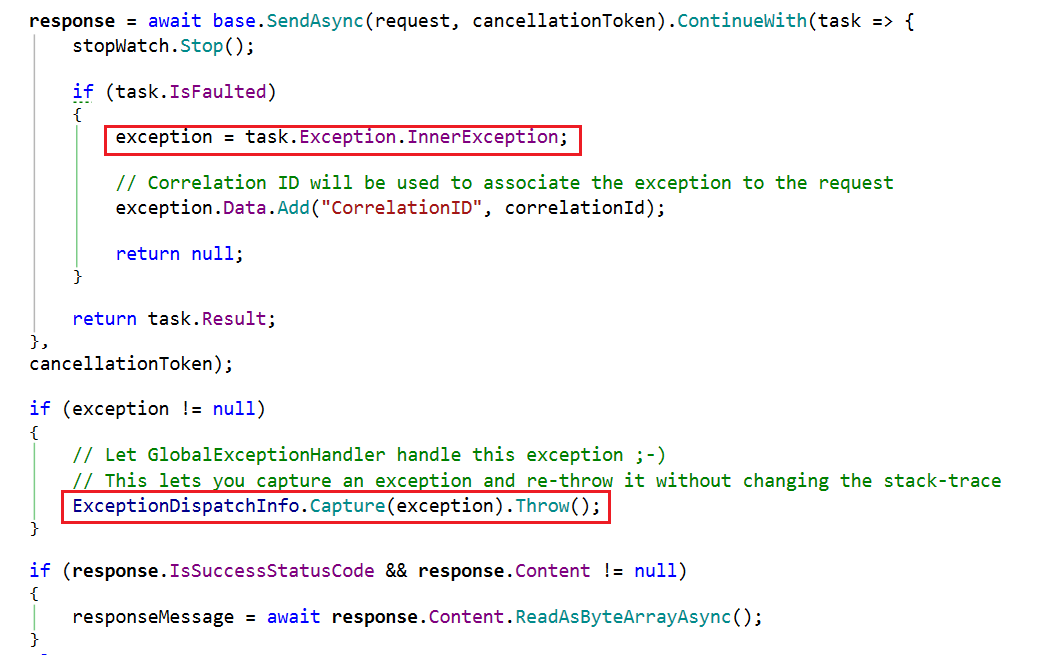
02_throw_messagehandler_wrong.png

Just to give you some context, this excerpt is from a MessageHandler that I implemented to log HTTP requests and responses in a ASP.NET Web API application (based on Log message Request and Response in ASP.NET WebAPI). I have an ExceptionHandler class that will log all unhandled exceptions, that’s why I’m re-throwing the exception here.

The problem is that the following command will instantiate a new exception and clear the original stack trace:

throw exception;

Fortunately there is an easy fix. From .NET v4.5 you can use ExceptionDispatchInfo class to capture the current state of an exception and re-throw an exception without changing the original stack-trace:
03_throw_messagehandler_right

That’s it! Happy coding 🙂

When to create a Nuget stable release?

I was having a chat with another member of my team this morning about Nuget package versioning – the question was the following:

When should we create a stable release version of a NuGet package? 

I found the answer in Building pre-release packages: a stable release is one that’s considered reliable enough to be used in production. It’s just as simple as that. Also, keep in mind that the latest stable release is also the one that will be installed as a package update or during package restore:

nuget-stable1

For more details please go to Building pre-release packages (package versioning, pre-release versions, reinstalling and updating packages, etc).

Disabling ‘member is obsolete’ warnings on Visual Studio Team Services

The scenario – I am working on a new functionality solution that has many members marked as Obsolete (some are not being used at the moment and others will be removed in the future). When the solution is compiled warnings are being generated as follows:
01-vstudio-warnings

And this is how things are supposed to work – other developers working in the same solution will know straight away that these members should not be used. It’s perfectly fine to diplay these warnings locally, but honestly I don’t think it makes sense to display them on the build server.

MSbuild has a property named nowarn that can be used to suppress compiler warnings. In my case, I want to suppress warnings CS0612 (‘member’ is obsolete) and CS0618 (‘member’ is obsolete: ‘text’).

In VSTS add the following to the MSBuild arguments to your Visual Studio Build task:

/p:NoWarn=”612,618″

02-build-task.png

That’s it! No more ‘member’ is obsolete warnings will be displayed when running a new build. Remember to add the same arguments to other tasks that might use MSBuild (for example, I have another task that generates an ASP.NET deployment package which was generating the same warnings).

Happy coding!