
In this post I’ll show you how to automate the creation of nuget packages using Build Events in Visual Studio.
Table of contents
The Problem
You want to create a nuget package for a class library in order to use it in different applications. You want to execute this task every time you build the project/solution.
The solution
In short, you need to create a .nuspec file for the project and then use a Post-Build Event Command Line to create the package.
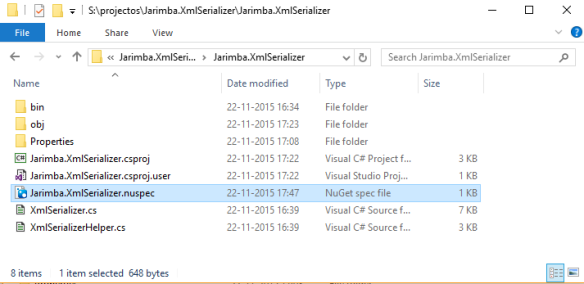
For demonstration purposes I created a small class library project that contains my XmlSerializer class. I’ll show you step by step how to create a nuget package for that project.
1) Download nuget.exe
Download nuget.exe from nuget.org and make sure it is in your path. This tool will be used to generate the .nuspec for the project and also to create the nuget package.
2) Generate the .nuspec file for the project
Open a command prompt in the folder where the .csproj is and run the following command:
nuget spec

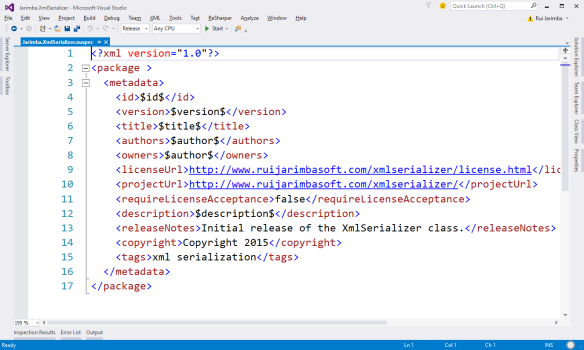
This command will create a .nuspec file for the project:
Open the .nuspec file in Visual Studio to see the content:

Edit or remove the licenseUrl, projectUrl and iconUrl. $id$, $version$, $author$, and $description$ are tokens that will be replaced with info from AssemblyInfo.cs file so I suggest you keep these tokens.
3) Edit the AssemblyInfo.cs file
As mentioned above some information will be pulled from the AssemblyInfo.cs file when creating the nuget package, so you need to edit it to ensure that all the information is correct. 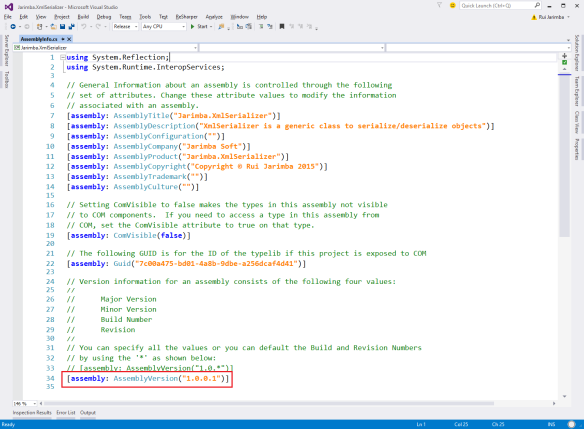
The most important attribute is the AssemblyVersion, that will correspond to the nuget package version.
4) Add a Post-Build Event to create the package and build the solution
Build events are commands that can run before the build starts or after the build finishes. In this case we want to run a command after a successful build to create the nuget package.
To do that right-click the project file and select Properties > Build Events and then paste the following command to the Post-build event command line textbox:
nuget pack $(ProjectPath) -Symbols -Properties Configuration=$(ConfigurationName) -IncludeReferencedProjects

Quick note: Use the -Symbols flag to generate a symbols package if you want others to step into your package’s code in the debugger. If the project references other projects, you can add the referenced projects as part of the package, or as dependencies with -IncludeReferencedProjects option.
Save the project file and rebuild the project/solution. If you open the output folder you’ll see that 2 .nupkg files were created, containing the version number from AssemblyInfo.cs:

Jarimba.XmlSerializer.1.0.0.1.symbols.nupkg is a symbols package that contains the source code and debug info. Visual Studio can be configured to automatically download PDB files associated with installed packages and allow the developer to use a debugger to step into source files on-demand from Visual Studio. If you don’t want to create it remove the -Symbols flag from the post-build event command line.
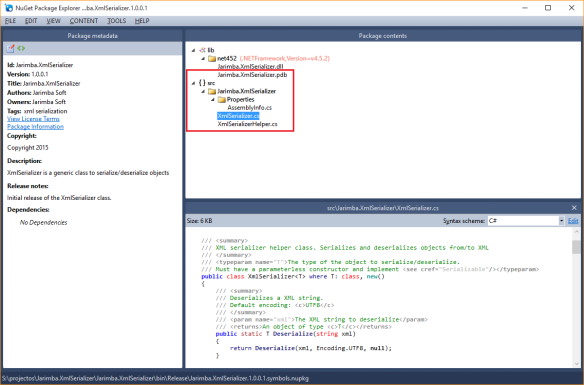
5) Confirm that the package was created correctly
Install and open Nuget Package Explorer – this is a great application that you can use to check if the package metadata and contents are correct. Click on “Open a local package” and open the package file. This is how the package file Jarimba.XmlSerializer.1.0.0.1.nupkg looks like:
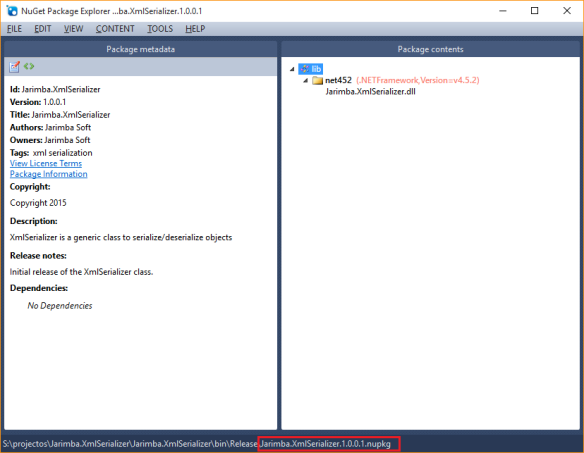
All good here! If you open Jarimba.XmlSerializer.1.0.0.1.symbols.nupkg you’ll notice that it contains the source code and the PDB file:
That’s it! Packages were created correctly and are now ready to be deployed to a nuget server 🙂
Final thoughts
As you can see it doesn’t take much time to create a nuget package for a project when building the project/solution.
Although it might be tempting to use the same approach for all your projects that will be deployed as nuget packages please keep in mind that it will take more time to compile the project/solution. If the project is small that’s fine as it might add only 2-3 seconds to the compilation time, but for larger projects I suggest that you create a script and execute it manually if/when you need to create and deploy the package.
If you’re using a Continuous Integration/Continuous Delivery server you should NOT use this approach. Nuget packages creation should be the very last task to be executed in the commit stage (i.e. the packages will be the artifacts of the build) and they should be created only and only if the build passes (code compiles, no failing tests, etc).

Step 4 is not getting executed getting error –>exited with code 9009
Hi Sunny,
What exactly is the error message? Any details?
After downloading nuget.exe make sure it is in your path and edit the AssemblyInfo.cs file, these steps are required in order to generate the packages successfully.
Regards,
Rui